7 Things to Do Before You Leave for Vacation
9/21/2016 (Permalink)
7 Things to Do Before You Leave for Vacation
These quick, simple tasks can help prevent coming home to a disaster.
Turn Off the Main Water Supply
If you're going to have a leaking supply line, it's going to happen while you're away. And a major leak could be catastrophic if there's nobody around to deal with it.
Closing the valve on the main supply line cuts off water to the house but still allows outside sprinklers to work. If you do spring a leak inside, the line will be under some initial pressure, but it will not continue to spray water. Instead of thousands, literally thousands, of gallons of water, you might have 50 gallons from the hot-water tank leak. There is no downside whatsoever [to turning off the water]. It takes a little bit of time, and it can save thousands of dollars in potential damage.
Check the Sump Pump
Another type of water—rainwater—can also be a nightmare. If your sump pump fails while you're gone and a major storm comes around, you could return to a flooded basement.
So make sure the sump pump is working before you leave town. Dump a bucket of water in there so you don't get that kind of surprise when you come home. The pump should turn on when the pit fills with water.
Turn Up the Thermostat—But Don't Turn Off the A/C Unit
If you have a programmable thermostat, You can set and hold the temperature to have the house at 85 degrees while you're gone [in the summer], then the day before you get back, get it down to 72. If you have a manual thermostat, it's still worth turning it up while you're gone to avoid wasting energy. You'll just have to deal with a hot house when you get back.
But don't turn off the air conditioner or furnace during your vacation. You want to keep the air circulating so it doesn't have time to condensate —it keeps the house from turning into an oven, which can impact wood doors, cabinets and flooring. You can have tremendous heat buildup, which can have an effect on surfaces like wood floors. Since wood expands when it's warm, excessive heat could cause the flooring to expand and buckle, and doors to not close properly.
The same goes for winter travelers, but in reverse. Turn down the thermostat while you're at Aunt Betty's for the holidays, but don't turn off the furnace completely, which could put your pipes in danger of freezing.
Keep Flowers Alive With a Soaker Hose
If you'll be gone for several days and don't have an in-ground sprinkler system (or a neighbor kid who can water your garden), use a soaker hose to keep the flowers or veggies watered. You can to set up your hoses on a timer to turn them on and off at preset times.
Unplug Electronics
If any of your televisions, computers, stereos, and other electronics are plugged directly into the wall rather than into a surge protector, pull the plugs in case a power surge happens while you're away. If you do have them all run through surge protects, O'Grady says, you can simply flip the switch to power them off.
Plus, unplugging electronics or turning off the surge protector can save you some coin. All of these electronics are drawing power, even when they're not in use. And that vampire voltage adds up. The Department of Energy estimates that the average U.S. family spends $100 annually to power devices that are turned off or in standby mode.
Light Rooms With Timers
To make your house appear occupied while you're gone and a less appealing target for burglars, put timers on lights in different rooms of the home. The timers turn on and off the lights at different times of the night, as if someone in the house were flipping a switch. Timers are available at home centers for less than $10 a piece. You want to leave the house looking like it's lived in.
Tips for closing your summer vacation home
9/21/2016 (Permalink)
 Tips for closing your summer vacation home
Tips for closing your summer vacation home
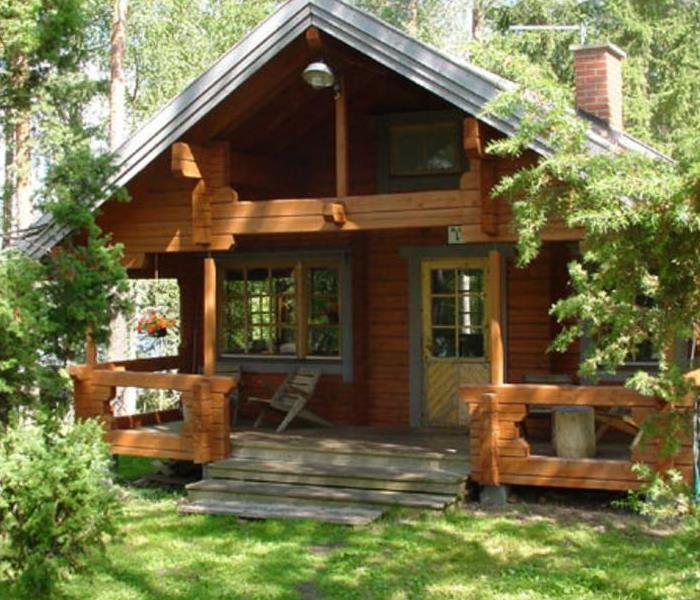
Posted by Scott Stueber on Sep 1, 2015 If you own a cottage or summer home, I’m sure Labor Day is bitter sweet for you. It’s the last long summer weekend, but it can also be a weekend with a lot of work. Yes, for many, this is the time of year when you decide to close the property for the season.
While it can be a sad time of year for those who love the summer heat and everything summer has to offer, it’s important to cherish all the fond memories and to think about how to close down your summer home or cottage safely.
The list below offers a number of things to consider when shutting down your vacation home for the winter.
1. Inspect your property – Take a walk around the inside and outside of your property to see if anything has been damaged. Create a checklist based of what you find and decide if it’s something that should be fixed now or when you open your home next spring. Items to inspect include your roof, chimney, eaves troughs, siding, foundation, trees that are leaning over your property, and out buildings.
2. Turn off the water – Turn off the water at the main supply point to prevent freezing pipes. Even if you keep your home heated during the winter, this is important in case your furnace fails or the power goes out.
3. Open your faucets and drain all water lines, including your appliances – Even if you turn off the water at the main supply into the home, it’s also important to drain the excess water from the water lines that run to your appliances, sinks, and toilets.
4. Temperature monitoring system – If you heat your home during the winter, consider purchasing a temperature-monitoring system. My brother-in-law purchased a system that sends email alerts to him if his summer home’s temperature drops below 55 degrees Fahrenheit.
5. Water flow monitoring systems – If you choose to leave your water on during the winter, consider purchasing a water flow monitoring system. A water flow monitoring system is attached to your water main and protects your entire house. The system works by measuring water flow into your house. If it detects continuous water flow beyond the normal stopping and starting of your every day appliances, it stops the flow of water into your house automatically.
6. Empty and clean your appliances
• Refrigerator/freezer – Remove all food and wipe them down with a disinfectant that kills bacteria. After you’ve cleaned it, consider leaving your refrigerator/freezer doors slightly ajar to prevent mold and mildew growth. This will also prevent smells from getting into the plastic. Consider putting a box of baking soda inside.
• Oven – Like your refrigerator, wipe it down with a disinfectant that kills bacteria and unplug it or turn off the gas.
• Washing machine/dryer – If you’re lucky enough to have these appliances at your summer home, disconnect the hoses and unplug them. If you want to disinfect your washing machine, consider running a normal cycle with vinegar or whatever cleanser your manufacturer recommends.
• Water heater – Drain your water heater and turn off the gas or switch it to vacation mode.
7. Store outdoor furniture and other expensive items in a locked garage or shed – If there isn’t storage space available on your property, consider renting a storage unit. A nice size storage unit will allow you to store outdoor furniture, bikes, small boats, and other summer toys that could be damaged if left outdoors.
8. Unplug your appliances and electronics – This tip will protect your appliances and electronics from power surges and lightning strikes.
9. Create a home inventory for your summer home – If you don’t have a summer home inventory, consider creating one. If your summer home was destroyed in a fire or by an early spring tornado, would you remember every possession you had in it?
10. Take your valuables home or consider a security system – Vacated summer homes can become easy targets for thieves during the winter months. If you prefer to leave valuables in the home, consider installing a security system.
11. Inspect your fireplace – If you have a wood burning fireplace that you’ve used for a number of years without cleaning, consider having it inspected and cleaned by a reputable chimney sweep. Creosote is a residue that travels up your chimney and builds up on your flue over time. In fact, some creosote builds up every time a wood burning fireplace is lit. If that residue isn’t properly cleaned out, the chance of a fire igniting in your chimney increases.
12. Partner with your neighbors or local police – If you have neighbors or friends who live near your summer home all year round, consider asking them to check on your home periodically. Also leave contact information with your neighbors or local police. Contact information should include your cell phone number, home phone number, and your e-mail address.
Creating a routine each time you leave your home empty for an extended period of time can reduce the likelihood of a disaster and keep work to a minimum when you return.
Your Home's Fall Checklist
9/21/2016 (Permalink)
 Heros to the Rescue.
Your Home's Fall Checklist
It's time to prepare your home to withstand winter's frosty bite.
Fall is the perfect time to take care of the little things that can make a big difference for you and your home. Most of the tasks listed below are well with-in the average person's ability. But even if you choose to have a professional handle them, it's worth the expense. You'll save money -- and maybe even your life.
Get your mind in the gutters. Inspect and clean gutters and downspouts.
Button up your overcoat. Seal gaps and cracks around windows and doors with weather-stripping and caulk.
Get on top of roof problems. Inspect your roof for damaged or curled shingles, corroded flashing, or leaky vents.
Walks the walks (and drives). Take steps to repair damaged sidewalks, driveways, and steps.
Chill out. Drain and winterize outdoor faucets and Irrigation systems.
Freshen your filter. Clean or replace dirty furnace filters.
Give your furnace a physical. Have a professional inspect your heating system.
Gather round the hearth. Check fireplaces for soot or creosote build-up. Better yet, schedule a visit from a reputable chimney sweep.
Keep the humidifier humming. Clean the plates or pads to ensure efficient operation.
Head-off gas problems. If you have a gas-fired room heater, have it inspected by a pro. Also, perform any routine maintenance recommended by the maker.
Keep the wood fires burning brightly. Wood stoves are making a comeback. To avoid a deadly situation, be sure to inspect yours before firing it up.
Keep your family safe at home. A home safety check should be an annual ritual in every household. Test smoke and CO monitors, inspect (or install) fire extinguishers, review fire escape plans, and rid your home of old newspapers and other fire hazards.
Get your mind in the gutters. Your roof's drainage system annually diverts thousands of gallons of water from your house's exterior and foundation walls. That's why it is so important to keep this system flowing smoothly. Clogged gutters can lead to damaged exterior surfaces and to water in your basement. They are also more prone to rust and corrosion. Before the leaves fly this fall, have your gutters cleaned, then covered with mesh guards to keep debris from returning.
Button up your overcoat. A home with air leaks around windows and doors is like a coat left unbuttoned. Gaps in caulk and weather-stripping can account for a 10% of your heating bills, according to the U.S. Department of Energy.
Weather-stripping is easily the most cost-effective way to rein in heating and cooling costs. This humble material also reduces drafts and keeps your home more comfortable year-round. Because weather stripping can deteriorate over time, it is important to inspect it periodically.
If you suspect a problem with weather stripping, you have several options for checking. Close a door or window on a strip of paper; if the paper slides easily, your weatherstripping isn't doing its job. Or, close the door or window and hold a lighted candle near the frame. (Don't let the flame get near anything flammable!) If the flame flickers at any spot along the frame, you have an air leak.
While you're at it, also check for missing or damaged caulk around windows, doors, and entry points for electrical, cable, phone, gas, and so. Seal any gaps with a suitable caulk.
Get on top of roof problems. Few homeowner problems are more vexing than a leaky roof. Once the dripping starts, finding the source of the problem can be time-consuming. Stop problems this fall before ice and winter winds turn them from annoyances into disasters.
Here's how: Inspect your roof from top to bottom, using binoculars if necessary. Check ridge shingles for cracks and wind damage. Look for damage to metal flashing in valleys and around vents and chimneys. Scan the entire roof for missing, curled, or damaged shingles. Look in your gutters for large accumulations of granules, a sign that your roof is losing its coating; expect problems soon. Finally, make sure your gutters are flowing freely.
Note: Roof-mounted television antennas, even if they aren't in use, may have guy wires holding them in place. Look for loose or missing guy wires. If you see some, and your antenna is no longer being used, consider having it removed altogether.
Walk the walks (and drives). Damaged walkways, drives, and steps are a hazard year round, but their dangers are compounded when the weather turns icy. Fixing problems in the fall is also critical to preventing little problems from becoming expensive headaches.
Look for cracks more than 1/8-inch wide, uneven sections, and loose railings on steps. Check for disintegration of asphalt, or washed-out materials on loose-fill paths.
Most small jobs are well within the ability of a do-it-yourselver, but save major repairs for experienced hands.
Chill out. If you live in an area with freezing weather, take steps to ensure that outside faucets (also called sill cocks) and inground irrigation systems don't freeze and burst.
Here's how: Close any shut-off valves serving outside faucets, then open the outside faucet to drain the line. (There may be a small cap on the faucet you can loosen to facilitate this draining.) If you don't have shut-off valves, and your faucets are not "freezeproof " types, you may benefit from styrofoam faucet covers sold at home centers.
To freezeproof an inground irrigation system, follow the manufacturer's procedure for draining it and protecting it from winter damage.
Freshen your filter. Furnace filters trap dust that would otherwise be deposited on your furniture, woodwork, and so on. Clogged filters make it harded to keep your home at a comfortable temperature, and can serious increase your utility bills. A simple monthly cleaning is all it takes to keep these filters breathing free and clear.
Here's how: Disposable filters can be vaccumed once before replacement. Foam filters can also be vaccumed, but they don't need to be replaced unless they are damaged. Use a soft brush on a vacuum cleaner. If the filter is metal or electrostatic, remove and wash it with a firm water spray.
Give your furnace a physical. Once a year, it's a good idea to have your heating system inspected by a professional. To avoid the last-minute rush, consider scheduling this task in early fall, before the heating season begins.
Here are signs that you should have an inspection performed sooner:
Noisy belts. Unusual screeches or whines may be a signal that belts connected to the blower motor are worn or damaged.
Poor performance. A heating system that doesn't seem to work as well as it once did could be a sign of various problems. Your heating ducts might be blocked, the burners might be misadjusted, or the blower motor could be on its last legs. One check you should be sure to conduct: Make sure your furnace filter is clean.
Erratic behavior. This could be caused by a faulty thermostat or a misadjusted furnace.
Gather round the hearth. Even if you use your fireplace only occasionally, you should check it annually for damage and hazards.
Inspect your flue for creosote. Creosote is a flammable by-product of burning wood. If it accumulates in a flue or chimney, the result can be a devastating fire. Have your chimney inspected annually for creosote buildup. If you use a fireplace or wood stove frequently, have the flue inspected after each cord of wood burned.
For most people, the best option is to have your entire chimney system inspected by a chimney sweep. Once you know what to look for, you can perform the inspection by shining a bright flashlight up the flue, looking for any deposits approaching 1/8 inch thick. These deposits should be cleaned by an experienced chimney sweep.
Look for flue blockages. Birds love to nest at the top of an unprotected flue. A chimney cap can prevent this from happening. If you don't have a cap, look up the flu to ensure that there are no obstructions.
Exercise the damper. The damper is the metal plate that opens and closes the flu just above the firebox. Move it to the open and closed positions to ensure that it is working properly.
Check your chimney for damage. Make certain that the flue cap (the screen or baffle covering the top of the chimney) is in place. Inspect brick chimneys for loose or broken joints. If access is a problem, use binoculars.
Keep the humidifier humming. You may know that bone dry winter air is bad for your health, but did you also know it can make fine wood more prone to cracking? You and your home will feel more comfortable if you keep your central humidifier in tip-top shape during the months it is running.
Here's how: First, inspect the plates or pads, and if necessary, clean them in a strong laundry detergent solution. Rinse and scrape off mineral deposits with a wire brush or steel wool.
Head-off gas problems. Keeping a gas heater in good shape is both a safety and a cost issue. An improperly maintained heater can spew poisons into the air of your home, or it may simply be costing you more to operate. Have a professional check these devices annually. There are also some maintenance items you should address.
Here's how: First, shut off the heater. Then check the air-shutter openings and exhaust vents for dirt and dust. If they are dirty, vacuum the air passages to the burner and clean the burner of lint and dirt. Follow the manufacturer's advice for any other needed maintenance.
Keep the wood fires burning brightly. Wood burning stoves are a great way to add atmosphere and warmth to your home. But regular inspections are needed to ensure that these devices don't become a safety hazard. Here's how to check them.
Inspect stovepipes. Cracks in stovepipes attached to wood stoves can release toxic fumes into your home. Throughout the heating season, you should check for corrosion, holes, or loose joints. Clean the stovepipe, and then look for signs of deterioration or looseness. Replace stovepipe if necessary.
Look for corrosion and cracks. Check for signs of rust or cracking in the stove's body or legs.
Check safety features. Make sure that any required wall protection is installed according to the manufacturer's specifications and that the unit sits on an approved floor material. If you have young children, be sure to fence off the stove when it is in operation.
At least once a year, do a top-to-bottom review of your home's safety features. This is also a good time to get the family together for a review of your fire evacuation plan. Here's how to do this:
Smoke and CO detectors. Replace the batteries in each smoke and carbon monoxide (CO) detector, then vacuum them with a soft brush attachment. Test the detectors by pressing the test button or holding a smoke source (like a blown-out candle) near the unit. If you haven't already, install a smoke detector on every floor of your home, including the basement.
Fire extinguishers. Every home should have at least one fire extinguisher rated for all fire types (look for an A-B-C rating on the label). At a minimum, keep one near the kitchen; having one per floor isn't a bad idea. Annually, check the indicator on the pressure gauge to make sure the extinguisher is charged. Make certain that the lock pin is intact and firmly in place, and check that the discharge nozzle is not clogged. Clean the extinguisher and check it for dents, scratches, and corrosion. Replace if the damage seems severe. Note: Fire extinguishers that are more than six years old should be replaced. Mark the date of purchase on the new unit with a permanent marker.
Fire escape plans. Every bedroom, including basement bedrooms, should have two exit paths. Make sure windows aren't blocked by furniture or other items. Ideally, each upper-floor bedroom should have a rope ladder near the window for emergency exits. Review what to do in case of fire, and arrange a safe meeting place for everyone away from the house.
General cleanup. Rid your home of accumulations of old newspapers and leftover hazardous household chemicals. (Check with your state or local Environmental Protection Agency about the proper way to discard dangerous chemicals.) Store flammable materials and poisons in approved, clearly labeled containers. Keep a clear space around heaters, furnaces, and other heat-producing appliances.


 24/7 Emergency Service